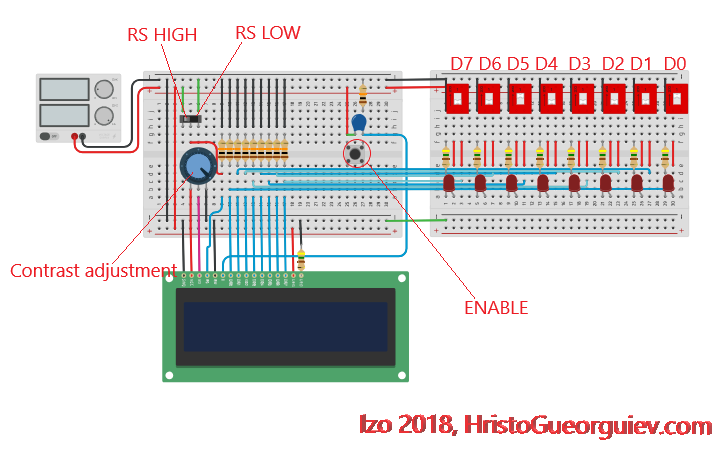
HD44780 compatible LCD displays are controlled via a built in MCU, as such driving them to display text is just a matter of sending them the appropriate commands in the control protocol. Doing that from another MCU is quite trivial, however I had seen it done with just dip switches and seemed like a good exercise in some electronics basics, so built the circuit in Tinkercad.
Here is a link:
https://www.tinkercad.com/things/60PXFapAiJd
Commands are listed here, image credit to www.electronicshub.org:
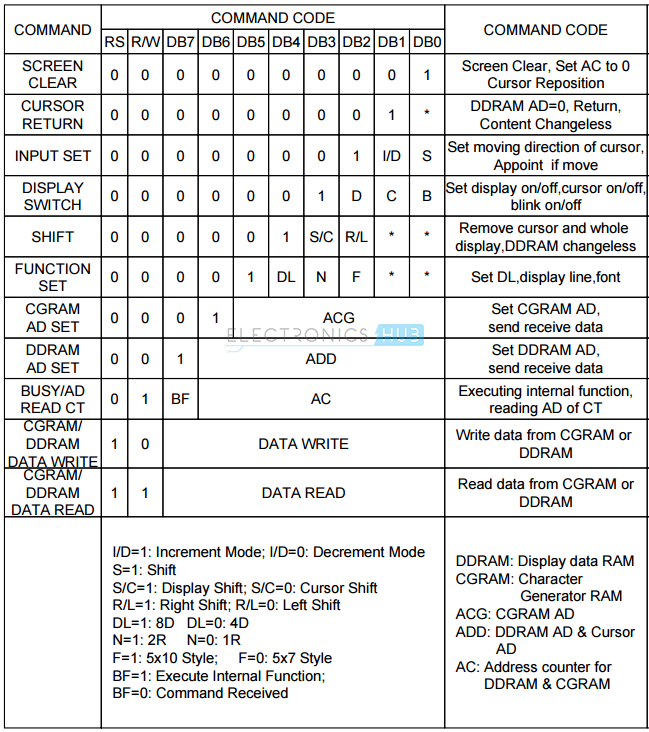
Driving the display can be as simple as sending the following :
Flip RS switch to LOW (GROUND).
00111000 – This data pin configuration sets 8bit data line, 2 rows. Pulse the Enable button.
00001111 – This data pin configuration turns on the display, cursor and sets cursor to blinking. Pulse the Enable button.
00000001 – This data pin configuration clears the display. Pulse the Enable button.
00000110 – This data pin configuration sets cursor movement direction. Pulse the Enable button.
Flip RS switch to HIGH (+5v).
XXXXXXXX – Whatever value is on the 8 data pis will be sent to the display when Enable is pulsed, the LCD will display the character corresponding to that ASCII code.